4 - Compressing and saving the image using SaveForWeb
Right, now we've finished editing our image - let's save it in a format suitable for the web. The best option for photographs is to use JPEG compression. JPEG is a lossy compression method, which means that it discards information we're less likely to notice is missing in order to save space and improve download speeds - the upside is that it can create files significantly smaller than the original, the downside is that sometimes the image will look blocky and/or have strange echoes around sharp edges.
Note: JPEG should only be used at the end of your workflow - as repeatedly loading/editing/saving a JPEG will cause it to self destruct, so if you need to save middle steps, consider using a lossless image format like TIFF or PSD instead.
How do we save for web? Simple - just go to the File menu, and select Save for Web! The key advantages of SaveForWeb are that you can see what effect a certain amount of compression will have on your images before you commit to using it, and it can also create the smallest possible files for use online. The biggest disadvantage to SaveForWeb that it removes what's known as EXIF information from digital photographs. If you're unfamiliar with EXIF it's basically a method for storing some technical data inside an image file - it usually contains things like the camera used, lens, shutter speed, aperture, date, time etc.
So, here's what SaveForWeb looks like:

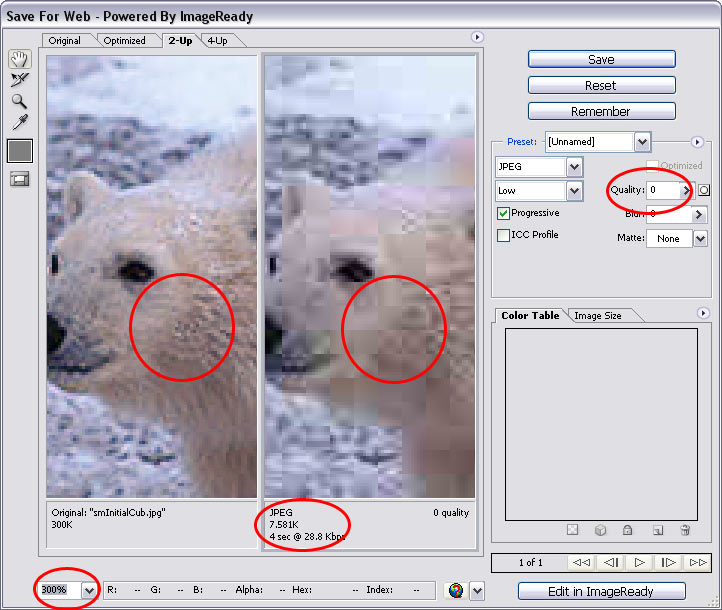
In the example above you'll notice the image on the right looks very blocky compared to the one on the left? That's a result of too much JPEG compression being applied to our preview - if you to the right of the image you'll see the quality slider is set to "0". The strange mosaic like block effect is called JPEG artifacting.
With JPEG you can trade image quality for filesize (i.e. the size of the image on your hard disk) - smallest filesize = lowest quality. If you look beneath the right hand image you'll see information about it - particularly worth noting is the filesize - the original is 300k, the lowest quality JPEG is a mere 7.581k. The really impressive thing is that it's still recognisable as a polar bear!
In the examples on this page you'll notice that the polar bear appears magnified - that's because I've set the image magnification to 300% (in other words 3x real size) - because increasing the magnification makes any JPEG artifacts more visible. The magnification information is displayed in the bottom left hand corner. Click on the dropdown to choose a new value.
Each time you adjust and release the Quality slider the preview image will be updated, so you can see how your final image will look and what size it'll be.
Right, now let's try and find the optimal setting for saving this image. Gradually move the Quality slider to the right by clicking on it and dragging it across. Remember to release occasionally to see how the final image will look and what the filesize will be.
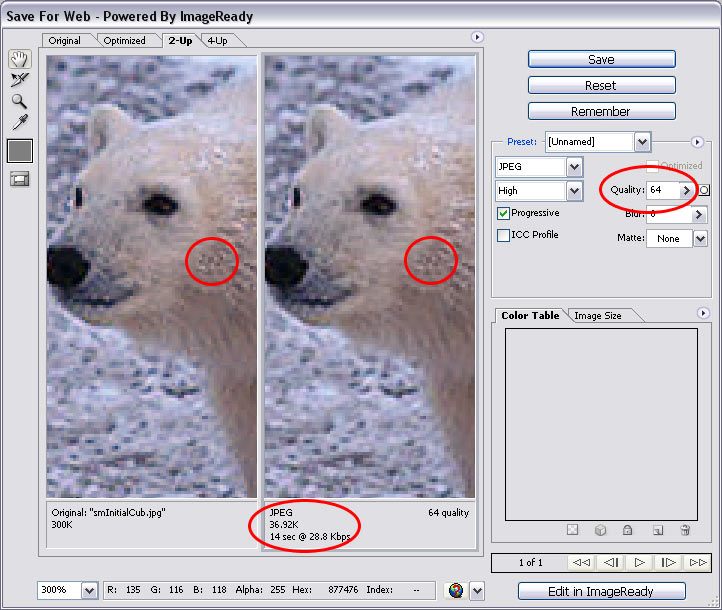
For this particular image a Quality value of 64 gives the best tradeoff between filesize and image quality. As you can see below:

A good starting value for most photographic images is 70. Beneath 50 most images have excessive echoes around sharp edges. Other areas to watch, in addition to sharp edges are blue skies and darker areas - remember to check for that mosaic effect I mentioned above!
That's it! Remember to click Save and then you're done :)
^ Home